Categories
Uncategorized

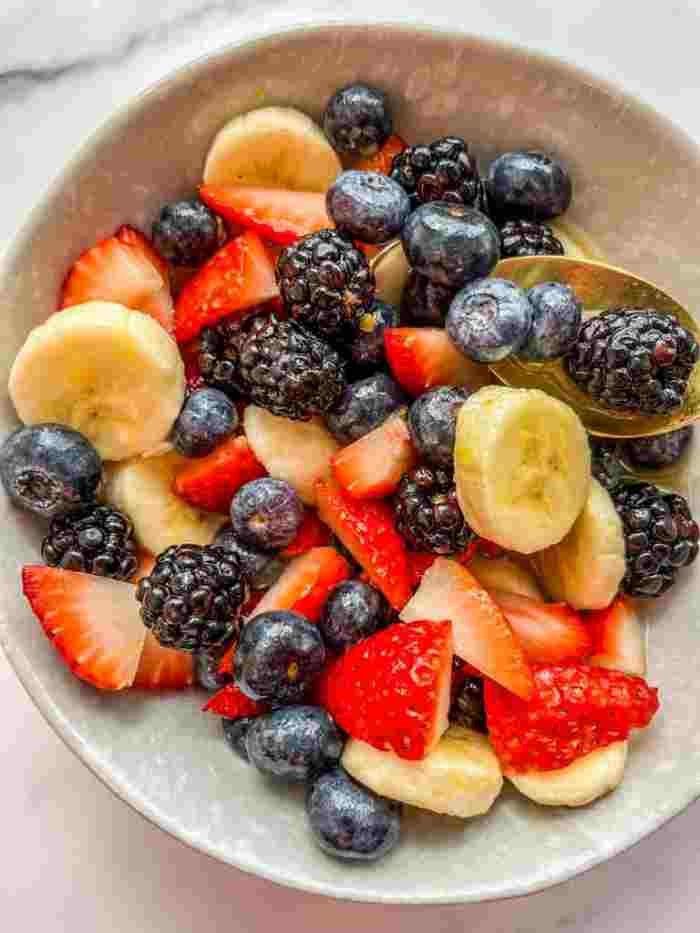
Fruit Salad Breakfast Ideas

Imagine waking up to the gentle rays of the sun streaming through your window, birds chirping merrily, and the promise of a brand-new day.This isn’t just any ordinary Fruit Salad Breakfast Ideas it’s a symphony of colors, flavors, and textures that will transport you to a tropical paradise.

Whether you’re a health-conscious individual or simply someone who appreciates the beauty of nature’s bounty, this fruit salad is your ticket to a brighter morning.So grab your favorite knife, put on your chef’s hat (or imaginary one), and let’s embark on this fruity adventure together.

How to Make This Irresistible Fruit Salad Breakfast Recipe

Prep the Fruits

  • Wash all the fruits thoroughly under cold water.
  • Hull the strawberries and slice them into bite-sized pieces.
  • Cut the pineapple into chunks, removing the tough core.
  • Peel the mango and dice it into small cubes.
  • Segment the orange by cutting away the peel and pith, then gently separate the segments.
  • Slice the banana and kiwi.

Assemble the Salad

  • In a lrge mixing bowl, combine all the prepared fruits.
  • Drizzle the honey over the fruits. Adjust the amount based on your desired level of sweetness.
  • Gently toss the fruits to coat them evenly with the honey.

Chill and Serve

  • Cover the bowl with plastic wrap or a lid.
  • Refrigerate the fruit salad for at least 30 minutes to allow the flavors to meld.
  • Just before serving, garnish with fresh mint leaves.
Categories
Uncategorized

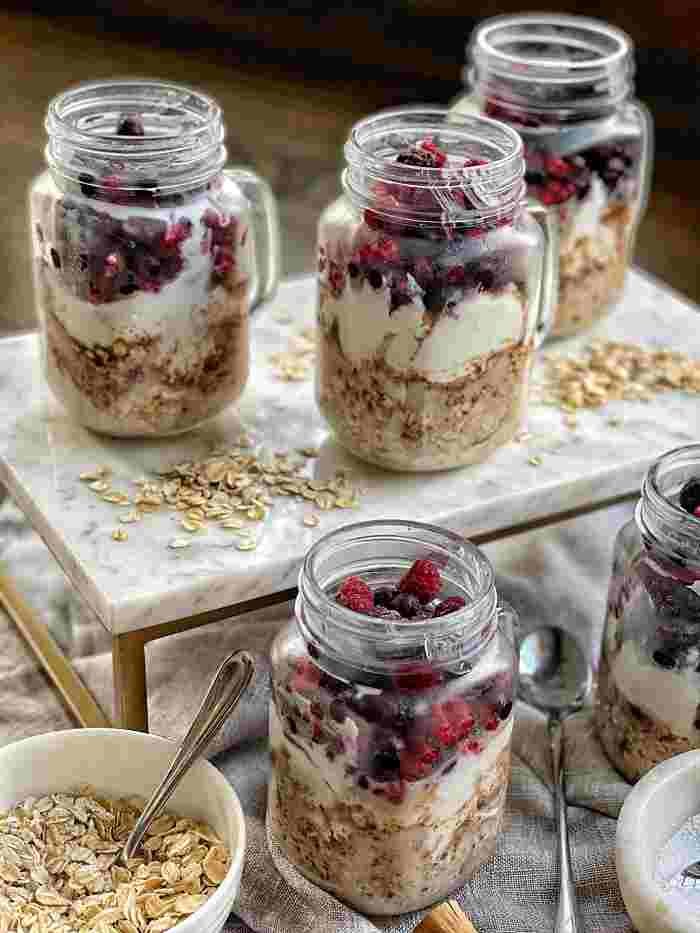
Mason Jar Oatmeal

 A glass jar, sunlight streaming through its sides, revealing layers of goodness. The base a generous scoop of old-fashioned rolled oats, the kind that has seen its fair share of sunrises. Next, a splash of almond milk, creamy and delicate, like a morning mist. Then come the toppings plump blueberries, toasted almonds, and a drizzle of honey that glistens like liquid gold. Finally, a sprinkle of cinnamon a warm hug for your senses. The Mason Jar Oatmeal steadfast and reliable, provide slow-release energy.

The almond milk, a gentle embrace for my lactose-intolerant tummy. The blueberries, bursting with antioxidants, remind me of summer mornings in the berry patch. And the honey oh, the honey it’s like a sweet promise that today will be golden.

How to Make Mason Jar Oatmeal Recipe

Layer the Oats

Grab a clean mason jar (about 16 oz or 500 ml capacity).

Start by adding half of the rolled oats to the bottom of the jar. These oats will absorb the liquid and soften overnight.

Add the Liquid

Pour the almond milk over the oats. You can adjust the amount of milk based on your desired consistency. Some like it thicker, while others prefer it more liquidy.

Give it a gentle stir to ensure the oats are fully submerged.

Top with Goodness

Sprinkle the fresh blueberries over the oats. They add natural sweetness and a burst of antioxidants.

Next, add the toasted almonds. These provide a delightful crunch and healthy fats.

Drizzle the honey over the top. The sweetness will balance out the tartness of the berries.

Finally, sprinkle the ground cinnamon—it’s like a warm hug for your taste buds.

Seal and Refrigerate

Screw the lid onto the mason jar tightly.

Pop it into the refrigerator and let the magic happen overnight. The oats will absorb the almond milk, and the flavors will meld together.

Morning Bliss

In the morning, give the jar a little shake or stir to mix everything up.

Unscrew the lid, take a deep breath, and enjoy your wholesome mason jar oatmeal.

You can eat it straight from the jar or transfer it to a bowl if you prefer.

Categories
Uncategorized

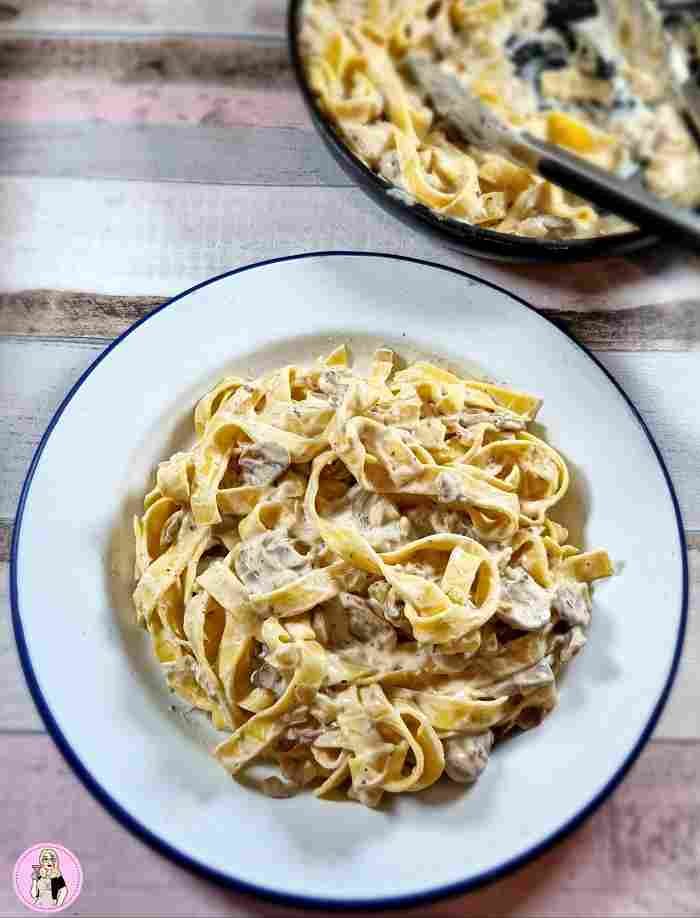
Low Calories Pasta Recipe

A cozy evening, a beautifully set table, and the aroma of a simmering pot of pasta wafting through the air. But wait, this isn’t your typical pasta ’is a guilt-free, Low Calories Pasta Recipe version that promises all the flavor without the extra inches on your waistline.

In this culinary adventure, we’ll dive into the world of wholesome ingredients, vibrant flavors, and the art of creating a pasta dish that satisfies both your taste buds and your health goals. So grab your apron, sharpen your chef’s knife, and let’s embark on this delightful journey together.

Serving Instructions

Portion Control

When serving this guilt-free pasta, remember that less is more. A modest portion will allow you to savor every bite without feeling weighed down. Trust me, it’s all about quality over quantity.

Garnish with Fresh Herbs

Before you plate up, sprinkle some freshly chopped basil, parsley, or chives on top. Not only does it add a burst of color, but it also enhances the overall flavor profile. Plus, it makes your dish look like a work of art.

Pair with a Light Salad

Balance out the meal by serving a crisp green salad on the side. A mix of arugula, cherry tomatoes, and a zesty lemon vinaigrette complements the pasta beautifully. It’s like a little garden party on your plate.

Grated Parmesan

For those who can’t resist a sprinkle of cheese, go ahead and add a touch of freshly grated Parmesan. The nutty, salty notes play harmoniously with the pasta’s flavors. Just remember, moderation is key.

Storage and Freezing Instructions

Refrigeration

  • Store any leftover pasta in an airtight container in the refrigerator.
  • It will stay fresh for up to 3 days.
  • When reheating, add a splash of water or broth to prevent it from drying out.

Freezing

  • Yes, you can freeze this low-calorie pasta!
  • Portion it out into individual servings.
  • Place each portion in a freezer-safe bag or container.
  • Label with the date and freeze for up to 2 months.
  • To thaw, transfer to the refrigerator overnight.
Categories
Uncategorized

Breakfast Casserole Bisquick

Imagine waking up to the aroma of sizzling bacon, the gentle crackle of eggs frying, and the warmth of a cozy kitchen. Now, add a dash of creativity and a sprinkle of convenience, and you’ve got yourself a Breakfast casserole Bisquick that’s both hearty and delightful.

In this recipe, we’ll take the classic breakfast casserole and give it a Bisquick twist. Bisquick, that versatile baking mix, is about to become your new best friend. It’s like having a secret ingredient that magically transforms ordinary ingredients into something extraordinary.

So, grab your apron, preheat the oven, and let’s embark on a culinary adventure. Whether you’re hosting a brunch, feeding a hungry family, or simply treating yourself, this breakfast casserole will make your mornings brighter.

Serving Instructions

Presentation Matters

When serving this casserole, remember that presentation matters. After all, we eat with our eyes first! Here’s how to make it visually appealing.

Garnish

Sprinkle some fresh herbs (parsley, chives, or dill) on top. It adds a pop of color and freshness.

Serve with Love

Use a beautiful serving platter or individual plates. Arrange the slices neatly, and perhaps add a slice of orange or a sprig of mint on the side.

Beverages

  • Coffee: A classic choice. Whether it’s black, latte, or cappuccino, coffee pairs wonderfully with the savory flavors.
  • Fresh Juice: Orange juice, apple juice, or a tropical blend—take your pick

Storage and Freezing Instructions

Storage

  • Refrigeration: If you have leftovers, store them in an airtight container in the refrigerator. It will stay fresh for up to 3 days.
  • Label and Date: Always label your container with the date to keep track of freshness.

Freezing

  • Pre-Cooked Casserole: You can freeze the entire casserole before baking it. Assemble all the ingredients in a freezer-safe dish, cover tightly with plastic wrap and aluminum foil, and freeze. It will stay good for up to 3 months.
  • Individual Slices: Alternatively, slice the cooked casserole, wrap each slice in plastic wrap, and place them in a freezer bag. Label and date the bag. These individual portions can be frozen for up to 1 month.

Thawing and Reheating

  • Thawing: To thaw, transfer the frozen casserole or slices to the refrigerator overnight.
  • Reheating: Pop the thawed casserole into a preheated oven at 350°F (180°C) for about 20-25 minutes until heated through. Individual slices can be reheated in the microwave.
Categories
Uncategorized

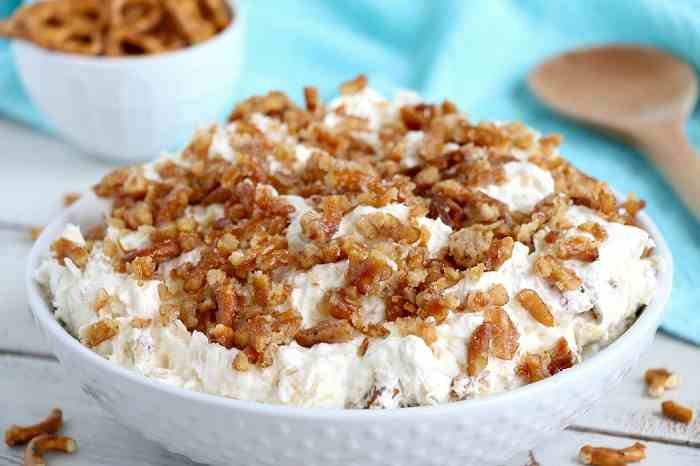
Pineapple Pretzel Salad

 My fellow food enthusiasts Gather ’round, for I have a delightful treat to share with you today. A sunny afternoon, a picnic blanket spread out under the shade of swaying palm trees, and a refreshing dish that combines the best of sweet, salty, and tangy flavors. Ladies and gentlemen, allow me to introduce you to the irresistible Pineapple Pretzel Salad.

Now, before you raise an eyebrow at the word “salad,” let me assure you that this is no ordinary leafy greens affair.This is a dessert salad a harmonious blend of tropical goodness that will transport your taste buds straight to a beachside paradise. So, kick off your shoes, put on your favorite Hawaiian shirt, and let’s dive into this culinary adventure together.

How to Make Pineapple Pretzel Salad

  • The Pretzel Crust:
    • Preheat your oven to 350°F (175°C).
    • In a mixing bowl, combine the crushed pretzels, melted butter, and 1/4 cup of granulated sugar. Mix until everything is well-coated.
    • Press this pretzel mixture into the bottom of a 9×13-inch baking dish. Make sure it’s nice and compact.
    • Bake the crust for about 10 minutes or until it’s golden brown. Let it cool completely.
  • The Creamy Layer:
    • In another bowl, beat the softened cream cheese with the remaining 3/4 cup of granulated sugar until it’s smooth and creamy.
    • Fold in the whipped topping gently. Imagine you’re whispering sweet nothings to it – that’s the level of gentleness we’re aiming for.
  • The Pineapple Crown:
    • Spread the cream cheese mixture over the cooled pretzel crust. Smooth it out evenly.
    • Now, sprinkle the drained crushed pineapple all over the cream cheese layer. Let those juicy pineapple bits nestle in comfortably.
  • The Gelatin Bond:
    • Dissolve the pineapple-flavored gelatin in 2 cups of boiling water. Stir until it’s completely dissolved.
    • Allow the gelatin to cool slightly (but not set) before pouring it over the pineapple layer. It’s like giving your salad a gelatin hug.
  • Chill Time:
    • Pop your Pineapple Pretzel Salad into the refrigerator and let it chill for at least 4 hours (overnight is even better). This gives all the flavors time to mingle and dance a tropical tango.
  • Finishing Touches:
    • When you’re ready to serve, garnish with maraschino cherries if you’re feeling fancy. They’re like little edible sunsets on your salad.
Categories
Uncategorized

Tik Tok Candy Grapes

  The delightful world of TikTok food trends!.Today, I’m thrilled to share with you a recipe that’s taken the internet by storm TikTok Candy Grapes.Imagine plump, juicy grapes transformed into bite-sized flavor bombs, coated in a sweet, crunchy shell. These little gems are like a party in your mouth a burst of sweetness with a hint of tartness.

Whether you’re hosting a picnic, a movie night, or just craving a fun snack, TikTok Candy Grapes are not only are they delicious, but they’re also surprisingly healthy. We’re talking about grapes, after allnature’s candy. So, let’s dive into this whimsical recipe and create a treat that’ll have everyone asking for seconds.

How to Make This TikTok Candy Grapes Recipe

Wash and Dry the Grapes

Start by washing your grapes thoroughly under running water to remove any dirt or residue. Pat them dry with a clean kitchen towel or paper towels. Make sure the grapes are completely dry before proceeding.

Prepare the Sugar Coating

In a small saucepan, combine equal parts of granulated sugar and water. For example, you can use 1 cup of sugar and 1 cup of water for every 2 cups of grapes. Place the saucepan over medium heat and stir until the sugar is fully dissolved, creating a simple syrup.

Coat the Grapes

Once the sugar syrup is ready, remove it from the heat and allow it to cool slightly. Take a few grapes at a time and gently dip them into the syrup, ensuring they are evenly coated. You can use a spoon or skewer to help coat the grapes if needed.

Add Food Coloring

For an extra pop of color, you can add a few drops of food coloring to the sugar syrup before coating the grapes. This step is entirely optional but can add a fun twist to your candy grapes.

Let Them Dry

Place the coated grapes on a baking sheet lined with parchment paper, making sure they are not touching each other. Allow the grapes to dry for at least 1-2 hours, or until the sugar coating has hardened.

Enjoy

Once the candy grapes are dry and the sugar coating has set, they are ready to be enjoyed! Serve them as a sweet snack or dessert, or use them to garnish cocktails and desserts for an extra touch of sweetness.

Tips

  • Experiment with different flavors by adding extracts or spices to the sugar syrup.
  • Store any leftover candy grapes in an airtight container at room temperature for up to 3 days.
Categories
Uncategorized

Easter Breakfast Casseroles

Easter morning holds a promise of joy and renewal, and what better way to embrace this spirit than with a heartwarming, healthy Easter Breakfast Casserole. As a chef who revels in the art of cooking and a writer who savors each word, I’ve crafted a dish that’s not just a meal but an experience.Imagine a casserole that’s a tapestry of vibrant colors and tantalizing aromas, a dish that wakes up the senses like the first rays of dawn. It’s a symphony of textures and flavors, where each ingredient sings in harmony with the others.

Crafting this casserole was like painting with flavors. I chose ingredients that are not only wholesome but also imbued with the freshness of spring. The tender greens, the robust cheeses, and the free-range eggs come together to create a dish that’s as nourishing for the body as it is for the soul.As you read on, you’ll discover not just the steps to create this culinary delight, but also the passion and care that went into perfecting it. Each bite is a testament to the love for good food and the joy of sharing it with loved ones on a day as special as Easter. So, let’s embark on this gastronomic journey together, and create a masterpiece that will be the centerpiece of your Easter table.

Serving Instructions

 To serve this Easter breakfast casserole, let the symphony of flavors reach its crescendo with the right presentation. Preheat your oven to a gentle warmth just before guests arrive, and place the casserole inside to ensure it greets them with a comforting embrace of heat. Serve it on a festive platter, garnished with fresh herbs that whisper tales of spring. Remember, the casserole is best enjoyed communal style, allowing everyone to scoop their own portion, fostering a sense of sharing and togetherness. Accompany it with a light, citrusy salad or fruit compote to balance the richness, and don’t forget a basket of warm, crusty bread to soak up the joy.

Storage and Freezing Instructions

 After the feast, if you find yourself with leftovers, they can be stored in the refrigerator, covered, for up to three days. The flavors will marry and deepen, offering a delightful encore. For freezing, slice the casserole into individual portions, wrap them tightly in cling film, and then in foil. Label each with the date, and they will serenade your taste buds for up to two months in the freezer. To reheat, thaw overnight in the refrigerator and warm in the oven until the center is piping hot. This casserole is not just meal a series of moments captured in every bite, ready to be relived.